Homemade Peanut Butter Cups with Rice Crisps
Highlighted under: Soft Inspiration
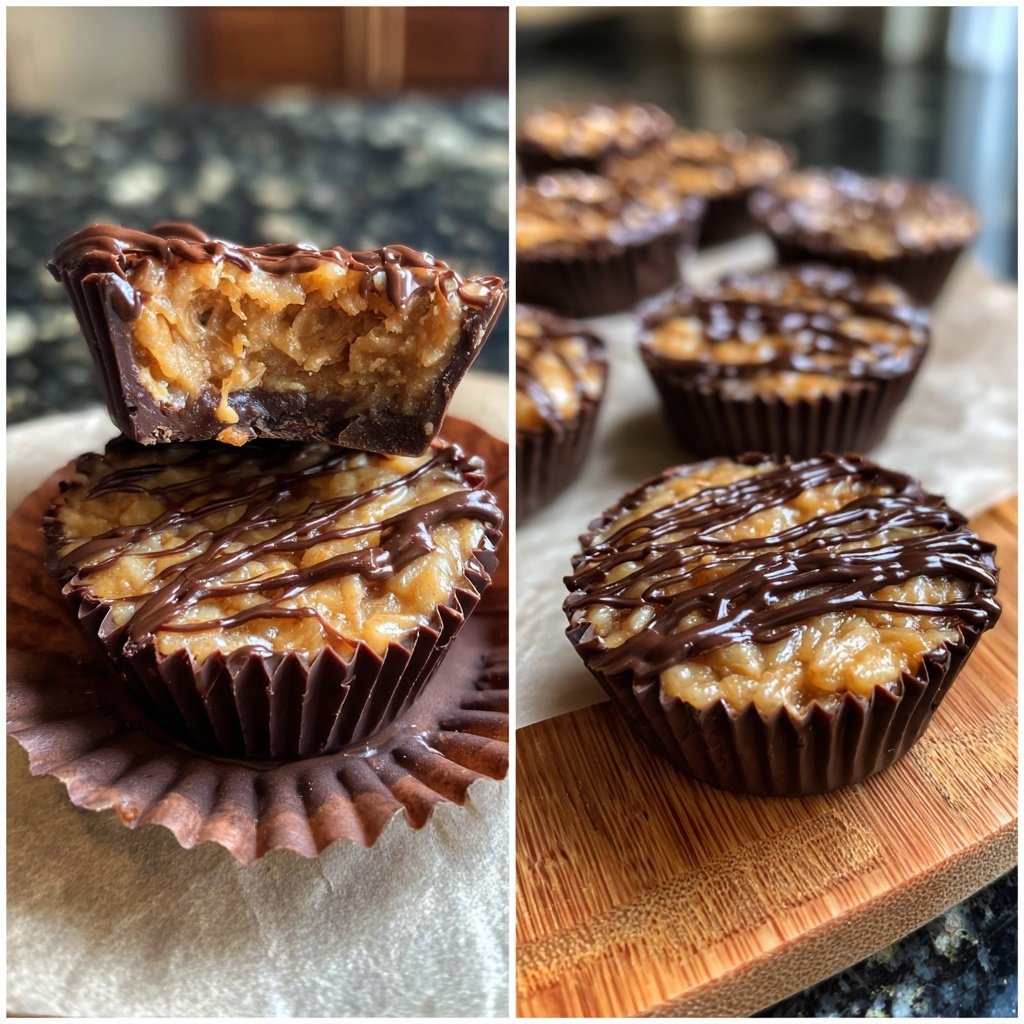
I absolutely love making these Homemade Peanut Butter Cups with Rice Crisps! They combine the creamy goodness of peanut butter with the delightful crunch of rice crisps, making them an irresistible treat. Each bite is a heavenly mix of textures and flavors that transports me back to my childhood. In just a few simple steps, I can whip up these delicious cups that not only satisfy my sweet tooth but also impress my friends and family. It's a quick recipe that always garners rave reviews!
When I first decided to make these Peanut Butter Cups, I wasn't sure how the addition of rice crisps would turn out. To my delight, the crunchy texture added a whole new dimension to this classic treat. I still remember the satisfaction of creating something so simple yet so delightful in my own kitchen.
After several attempts at perfecting the recipe, I found that layering the melted chocolate and peanut butter mixture with the rice crisps created a delightful contrast. Using high-quality chocolate also made a significant difference. Friends and family always ask for the recipe, and I enjoy sharing my new favorite treat!
Why You'll Love This Recipe
- Crunchy texture that contrasts perfectly with the creamy peanut butter
- Super easy to make with minimal ingredients
- Perfect for sharing at parties or keeping as a sweet snack
Understanding Ingredient Roles
The foundation of these Homemade Peanut Butter Cups lies in the ingredients, particularly the peanut butter. Opt for a creamy, natural peanut butter without added sugars or hydrogenated oils for the best taste and texture. This choice not only enhances the flavor but also ensures a smooth consistency when mixed with powdered sugar and rice crisps. If you're looking for a healthier alternative, almond butter can provide a similar creaminess with a unique nutty flavor.
Rice crisps are crucial for the delightful crunch that balances the creaminess of the peanut butter. They add a light, airy texture that contrasts beautifully with the rich chocolate layer. If you can't find rice crisps, you can substitute them with crushed graham crackers or even chopped nuts, keeping in mind that this may slightly alter the flavor and texture of the final product.
Techniques for Perfect Layers
When melting the chocolate for the cups, it's essential to do so gently to avoid scorching. Make sure to stir the chocolate every 30 seconds to track its progress and ensure a smooth, glossy finish. If you notice the chocolate thickening before fully melted, you can add a tiny bit more coconut oil to help it stay fluid. This will also give the chocolate a nice sheen when it hardens, making your cups visually appealing.
During assembly, allow the first layer of chocolate to set slightly before adding the peanut butter mixture. This prevents the layers from blending together and helps maintain distinct layers. After pouring in the chocolate, you can pop the muffin tin in the refrigerator for about five minutes to firm it up before adding the peanut butter, ensuring that each bite of your homemade cups has a delightful textural contrast.
Storage and Enjoying Your Treats
These Peanut Butter Cups can be stored in an airtight container in the refrigerator for up to two weeks. For longer storage, consider freezing them. Individually wrap the cups in plastic wrap and place them in a freezer-safe container. When ready to enjoy, simply thaw them in the refrigerator or at room temperature for about 15-30 minutes. This way, you can always have a delicious treat at hand without compromising the taste.
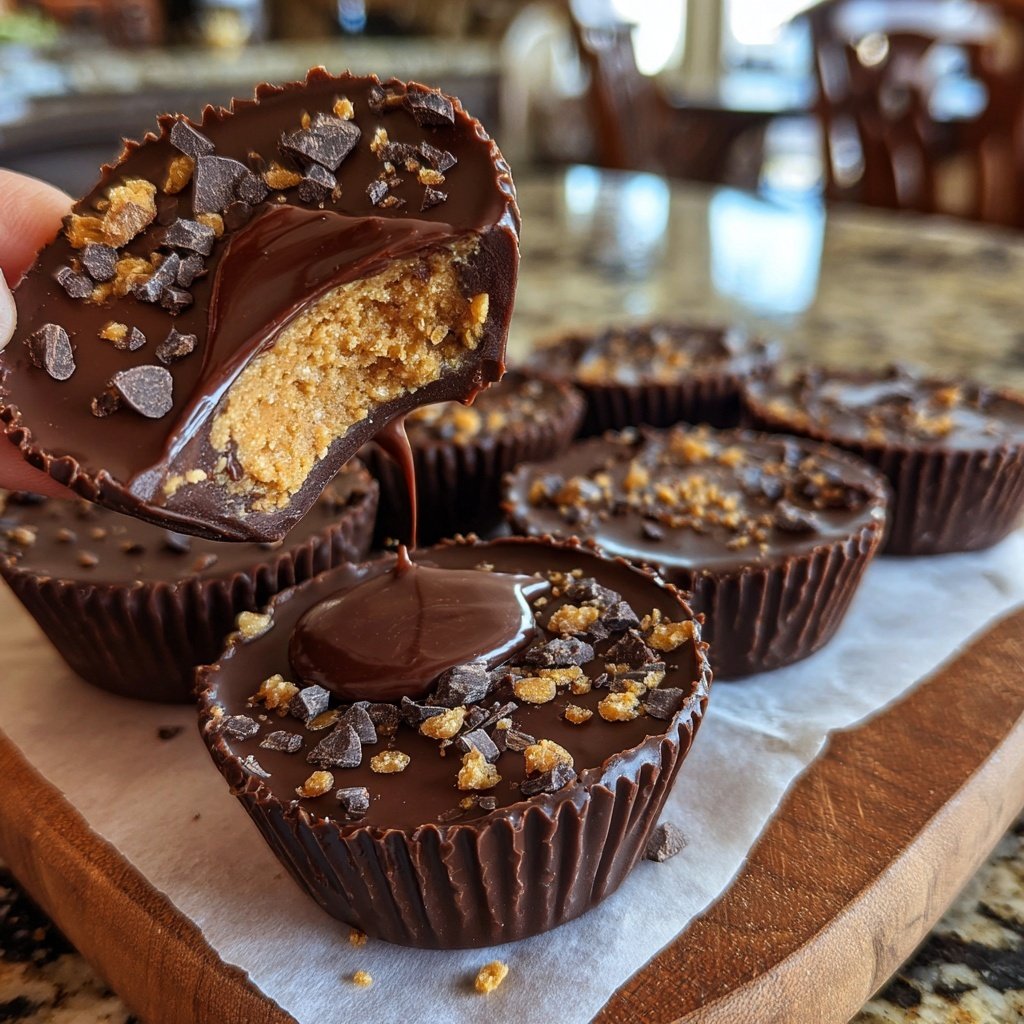
Serving suggestions include dipping the cups in melted chocolate or sprinkling a little sea salt on top before they set to elevate the flavor profile. Additionally, you can experiment with filling variations by adding mini marshmallows or pieces of caramel into the peanut butter mixture, creating a new twist that keeps your friends and family guessing!
Ingredients
For the Cups
- 1 cup creamy peanut butter
- 1/2 cup powdered sugar
- 1 cup rice crisps
- 1 cup dark chocolate chips
- 1 tablespoon coconut oil
Instructions
Steps
Prepare the Chocolate Layer
In a microwave-safe bowl, combine dark chocolate chips and coconut oil. Heat in 30-second intervals, stirring in between, until melted and smooth.
Make the Peanut Butter Mixture
In a separate bowl, mix together the peanut butter and powdered sugar until well combined. Fold in the rice crisps gently.
Assemble the Cups
Line a muffin tin with cupcake liners. Pour a layer of melted chocolate into each liner, followed by a scoop of the peanut butter mixture, and top with more chocolate.
Chill and Serve
Refrigerate for about 15 minutes or until set. Once firm, remove from the liners and enjoy your homemade cups!
Enjoy!
Pro Tips
- For a more intense chocolate flavor, use dark or semi-sweet chocolate chips. You can also experiment with different nut butters for varied taste.
Troubleshooting Tips
If your chocolate isn't melting smoothly and looks clumpy, try reducing the heat or adding a bit more coconut oil. Remember, patience is key; overheating can cause chocolate to seize, turning it grainy instead of creamy. If you find yourself in this situation, you can salvage it by adding a small amount of hot water, stirring quickly, and returning it to the microwave for a few seconds.
Another common issue arises when the layers of chocolate and peanut butter meld together. To prevent this, ensure that the first chocolate layer is adequately firmed up before adding the other ingredients. If they do become mixed, don’t fret; just give it a good stir and it will have a delicious marbled effect while still tasting heavenly!
Scaling the Recipe
If you're looking to make a larger batch for a party, this recipe is incredibly easy to scale up. You can double or even triple the ingredients without altering the proportions. Just ensure you have enough muffin tins or consider using mini muffin tins for bite-sized versions that are perfect for gatherings!
Conversely, if you're craving a small batch for a quick treat, you can halve the ingredients. Use a smaller muffin tin or even silicone molds for fun shapes, which can add a personal touch. Just keep an eye on the chilling time since smaller portions may set faster in the refrigerator.
Questions About Recipes
→ Can I use crunchy peanut butter instead of creamy?
Yes, using crunchy peanut butter will add more texture to your cups!
→ How long can I store these peanut butter cups?
They can be stored in an airtight container in the refrigerator for up to one week.
→ Can I use milk chocolate instead?
Absolutely! If you prefer a sweeter treat, milk chocolate works wonderfully.
→ Is it possible to make these vegan?
Yes, simply use vegan chocolate and ensure the peanut butter is dairy-free.
Homemade Peanut Butter Cups with Rice Crisps
What You'll Need
For the Cups
- 1 cup creamy peanut butter
- 1/2 cup powdered sugar
- 1 cup rice crisps
- 1 cup dark chocolate chips
- 1 tablespoon coconut oil
How-To Steps
In a microwave-safe bowl, combine dark chocolate chips and coconut oil. Heat in 30-second intervals, stirring in between, until melted and smooth.
In a separate bowl, mix together the peanut butter and powdered sugar until well combined. Fold in the rice crisps gently.
Line a muffin tin with cupcake liners. Pour a layer of melted chocolate into each liner, followed by a scoop of the peanut butter mixture, and top with more chocolate.
Refrigerate for about 15 minutes or until set. Once firm, remove from the liners and enjoy your homemade cups!
Extra Tips
- For a more intense chocolate flavor, use dark or semi-sweet chocolate chips. You can also experiment with different nut butters for varied taste.
Nutritional Breakdown (Per Serving)
- Calories: 150 kcal
- Total Fat: 10g
- Saturated Fat: 3g
- Cholesterol: 0mg
- Sodium: 70mg
- Total Carbohydrates: 13g
- Dietary Fiber: 1g
- Sugars: 8g
- Protein: 3g